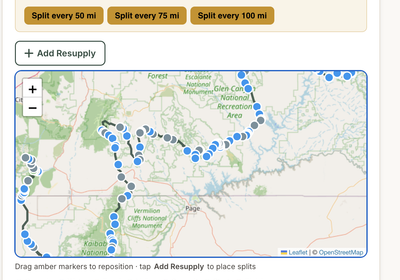
The Strava heatmap is one of the most underused planning tools in backcountry hiking. Most people know it was once used to accidentally reveal secret military bases when soldiers jogged their perimeters. But it’s also a good source of information to prevent you from getting cliffed out!
What the Strava heatmap actually shows you
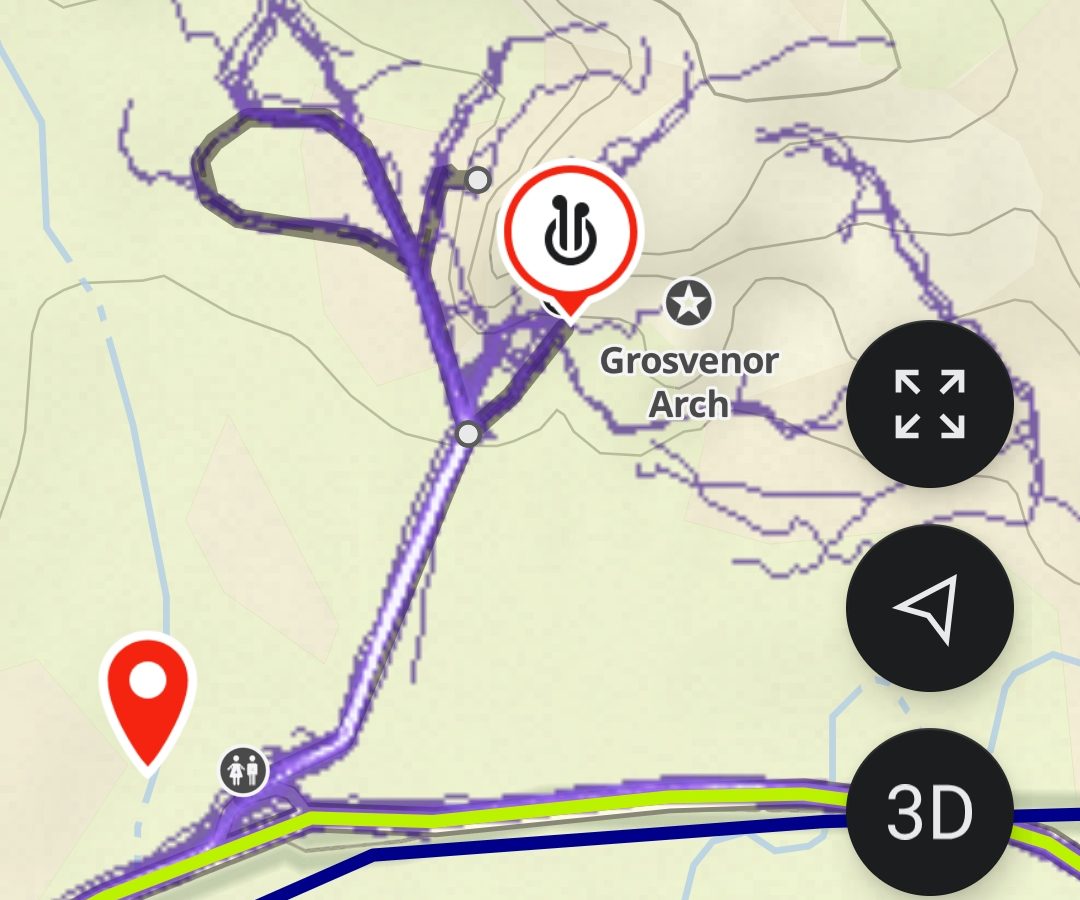
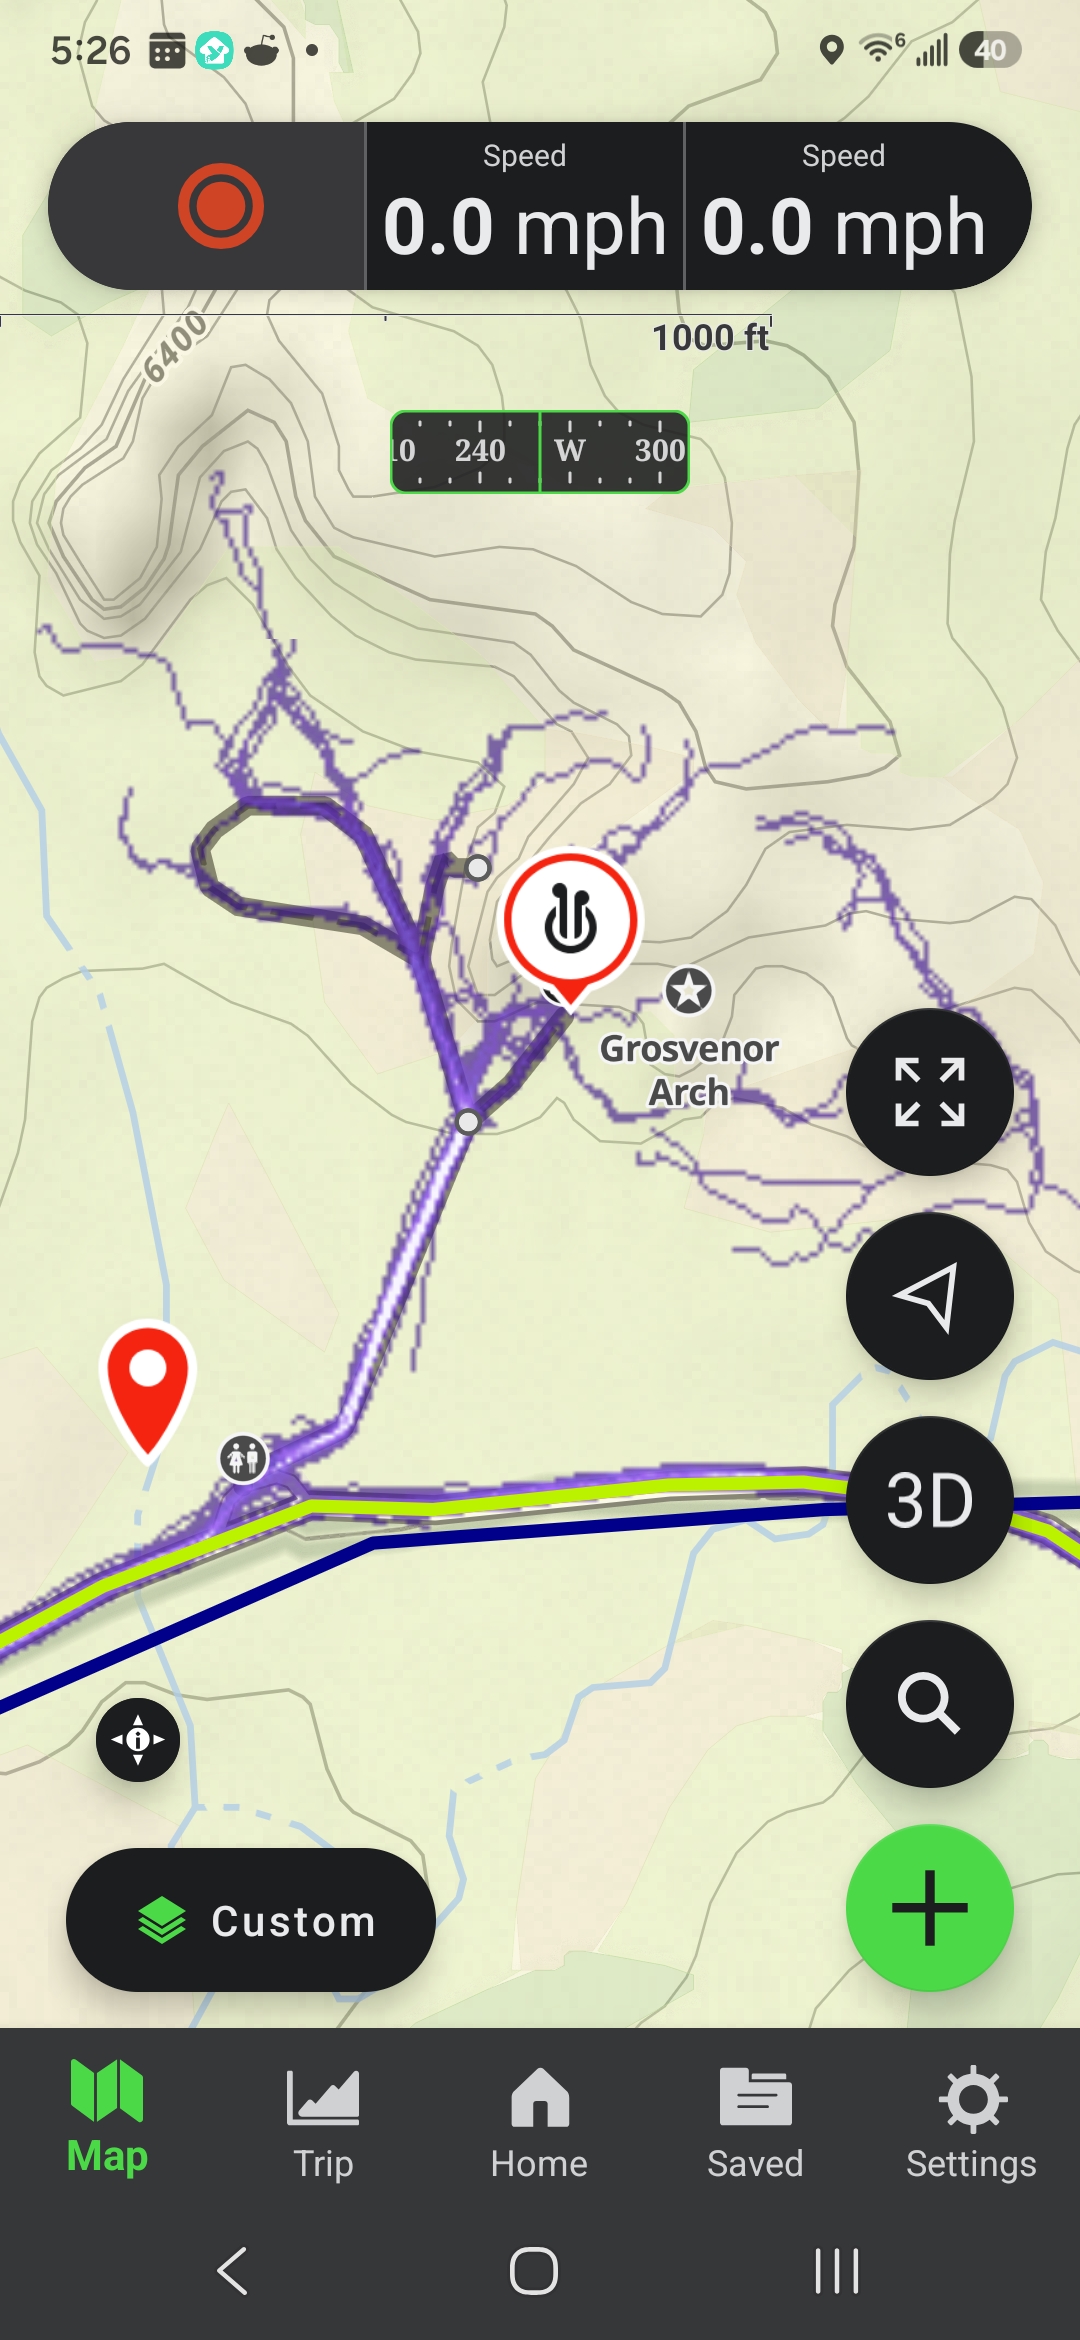
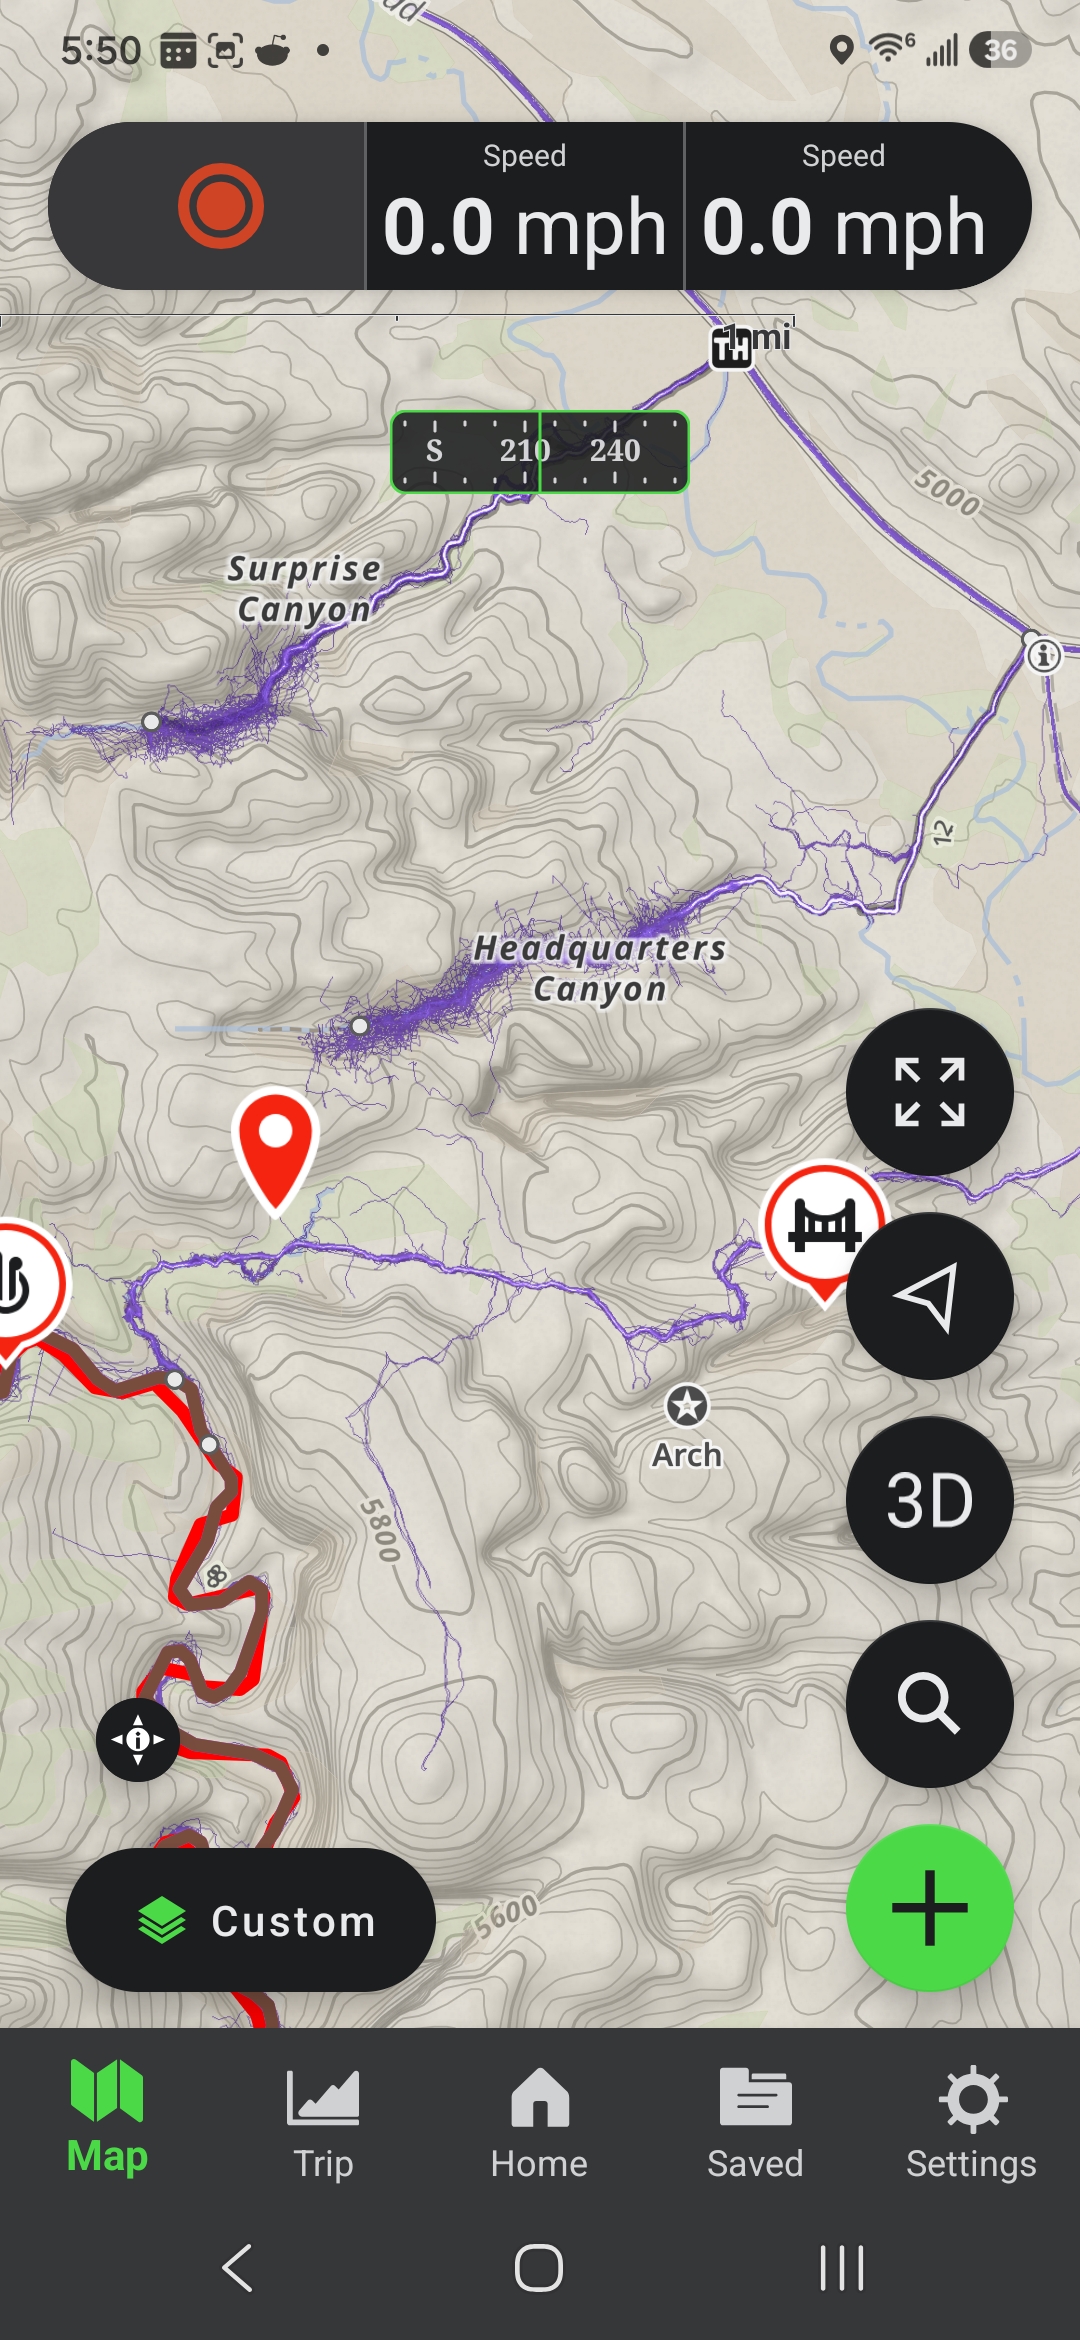
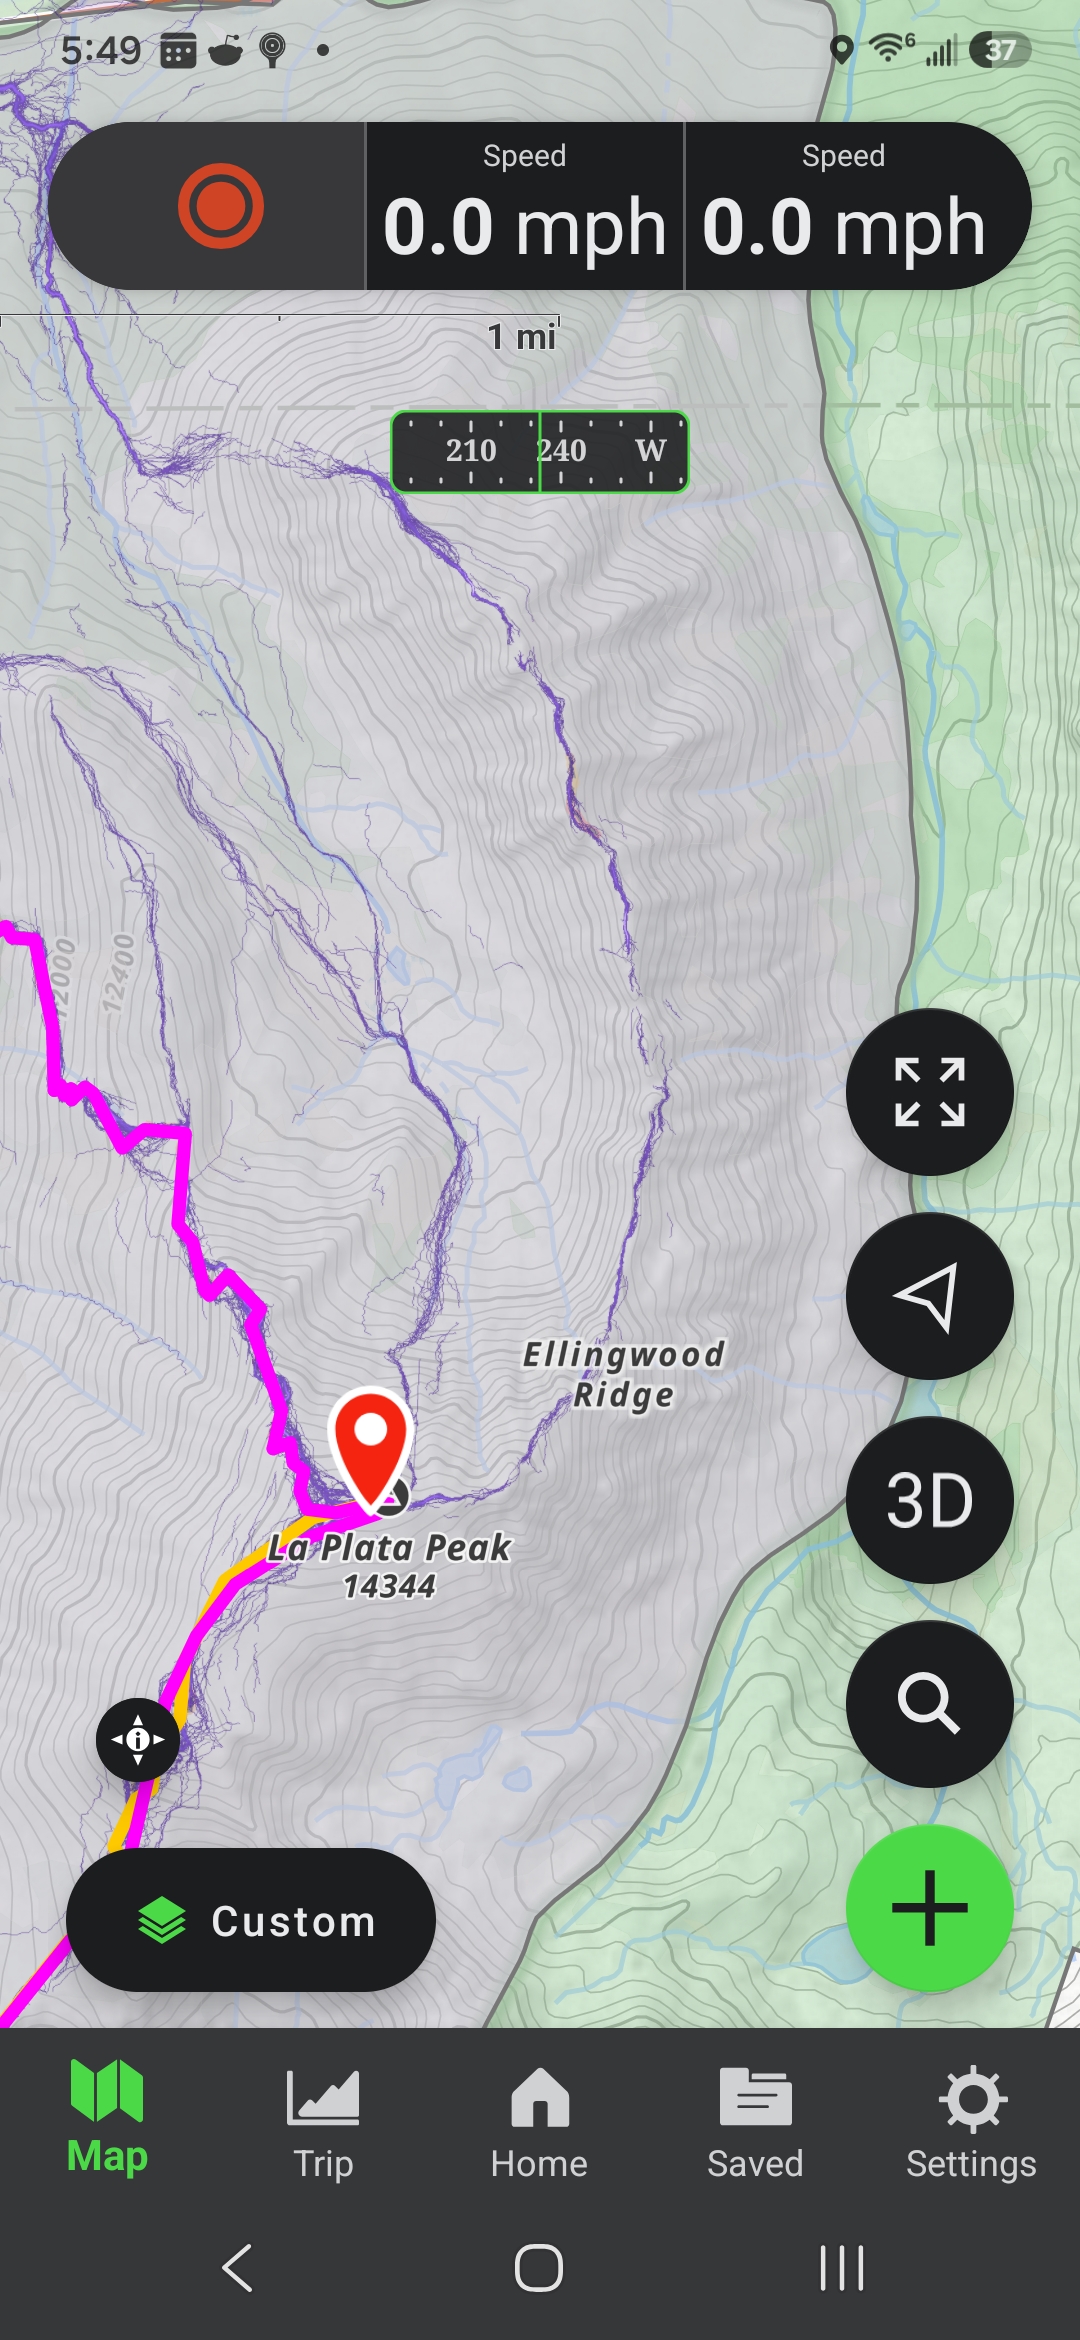
The heatmap is a density map of every GPS track uploaded to Strava. That’s a ton of data points from runners, cyclists, hikers, skiers, and anyone else recording activities outdoors. Bright areas have had a lot of people travel through them! You can see individual tracks from folks running and hiking through areas. Which means you get some information for off trail traverse if someone else has recently been through that area and recorded it on Strava. Not everywhere has tracks, but a lot of places do!
For backcountry route-finding, this is extraordinarily useful because the heatmap is essentially a crowd-sourced viability filter. If there’s a faint line glowing even slightly in the heatmap, someone has been there, which means a cliff band or off trail traverse likely goes!
I use it constantly for three specific things:
Cliffband avoidance. In terrain where you’re constantly choosing your own line through redrock, the heatmap can tell you instantly which gully exits and which canyon walls have been tested in well-travelled areas. Even a faint heatmap trace through an otherwise blank wall can be a good indication to investigate.
Route viability in mountain terrain. On routes like the Collegiate Peaks section of the Nolans 14, where you’re moving cross-country over ridges and through couloirs, the heatmap shows you exactly which col has seen foot traffic and which one is a dead end. It’s not perfect; some legitimate lines have never been recorded on Strava. But in popular ranges, the coverage is dense enough to be genuinely useful.
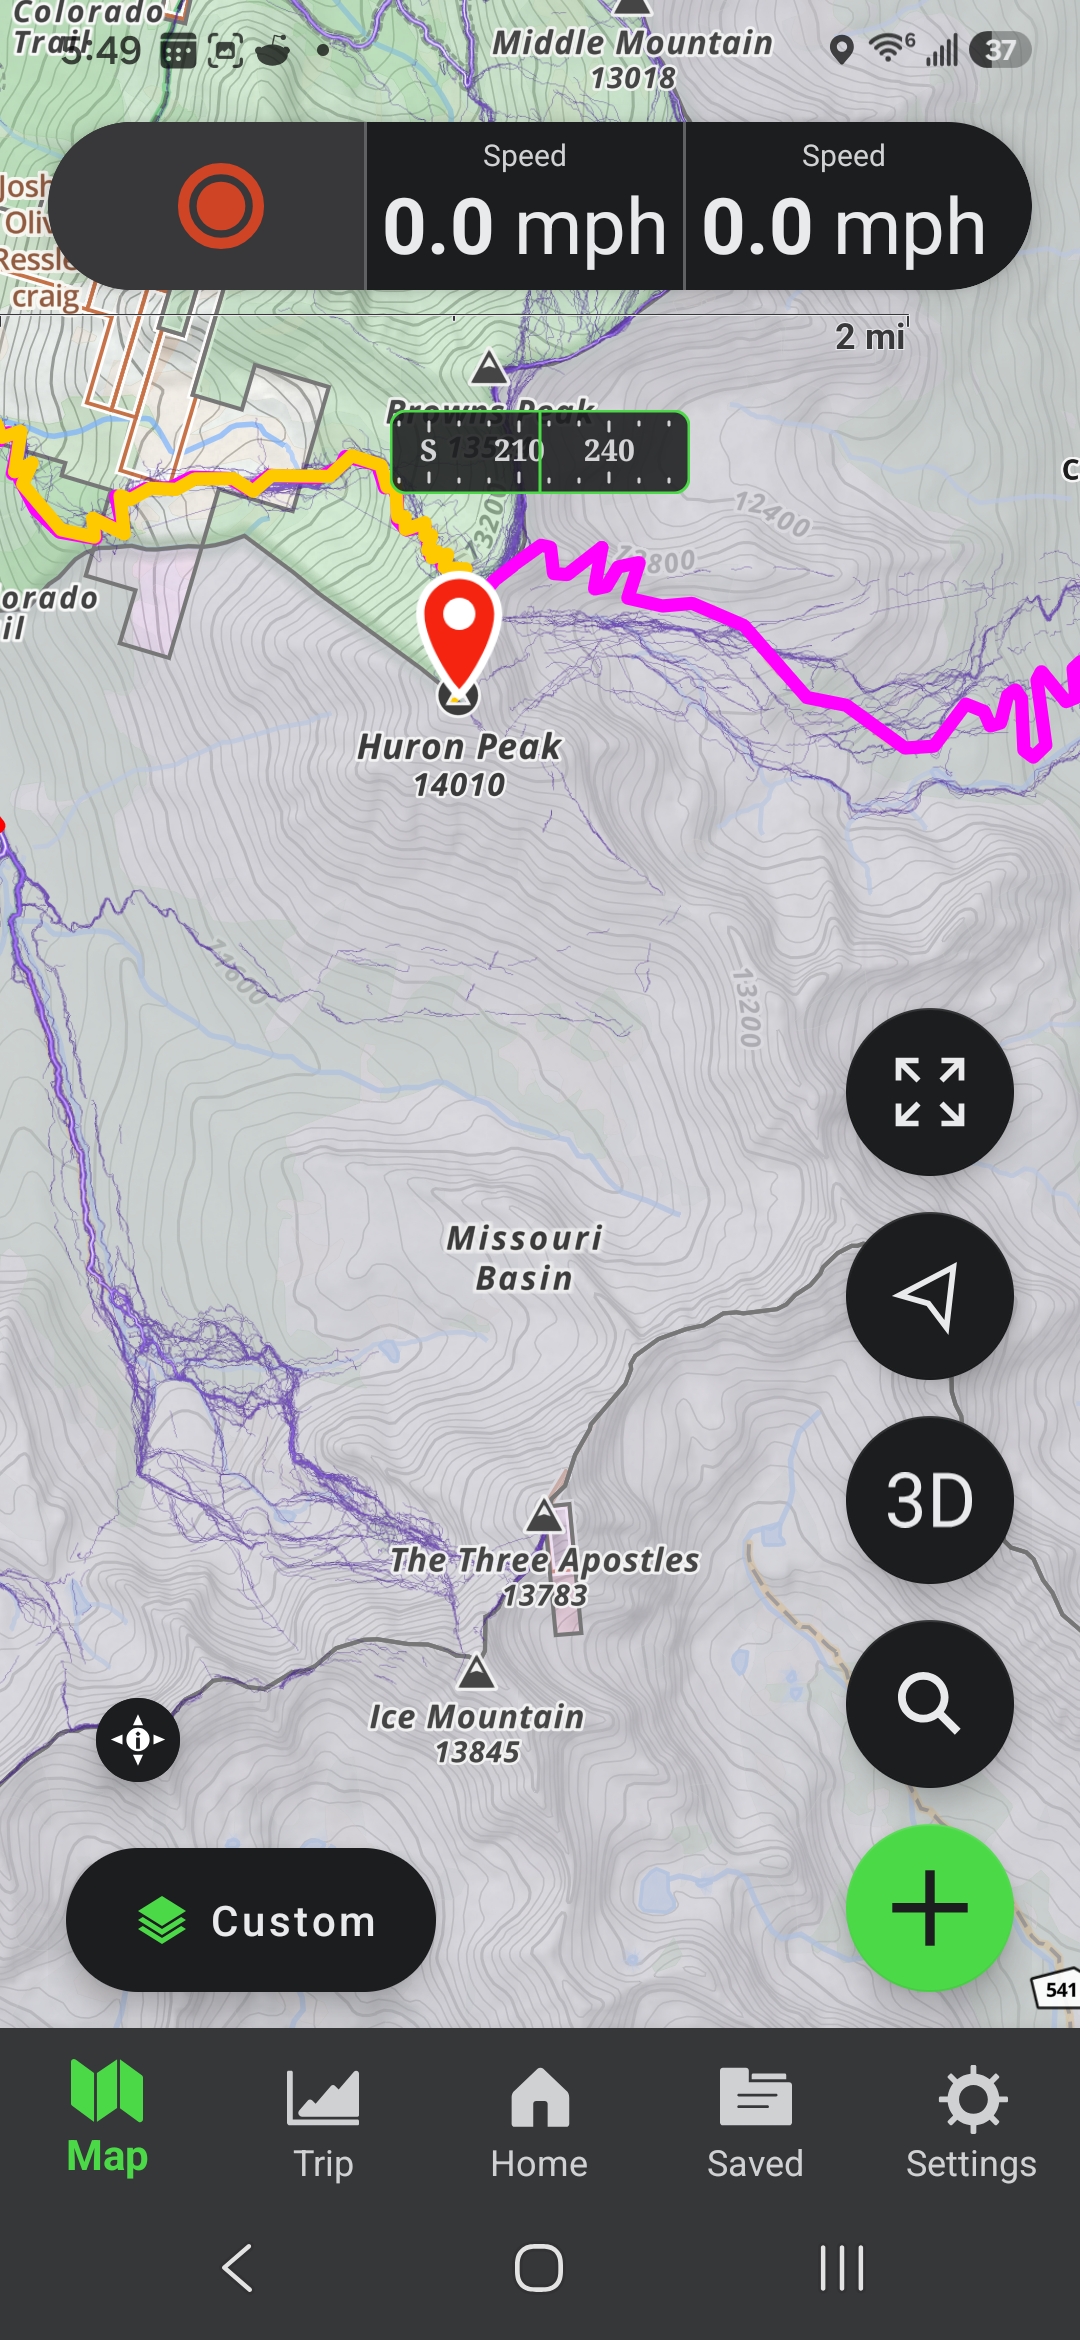
Hitchhike spots. Roads with high heatmap density are busy. A trailhead access road glowing orange has a lot of traffic, which means good hitching odds. A faint or dark road is going to be a long wait. Before a road walk or a hitch, I check the heatmap to get at least a little bit of beta on how viable a hitch might be.
Why you can’t just load it directly
Strava’s heatmap is technically available on their website, but they don’t offer a public tile URL you can plug into Gaia GPS. The tiles require authentication, and Gaia (or CalTopo) can’t handle that authentication natively.
The solution is a proxy: a small piece of server code that sits between Gaia and Strava, handles the authentication, and passes the tile images through. That proxy lives on Cloudflare Workers, which gives you free hosting for this kind of lightweight task.
The setup requires three free accounts and about 30 minutes. Every step happens in a web browser! So no coding or software to install to get this working.
Setup: Step by Step
What you’ll need
- A Strava account (free is fine; the global heatmap works without a paid subscription)
- A GitHub account (free at github.com; this is where the proxy code lives)
- A Cloudflare account (free at cloudflare.com; this runs the proxy server)
If you already have any of these, skip that step.
Step 1: Create your accounts
Strava: Sign up at strava.com. You don’t need to upload any activities. A blank account works fine for the global heatmap.
GitHub: Sign up at github.com. GitHub is where software projects are stored. You’ll be using it to host a copy of the proxy code.
Cloudflare: Sign up at cloudflare.com. Cloudflare is a company that, among other things, lets developers run small programs for free on their global network. The proxy runs here.
Step 2: Fork the proxy repository
“Forking” means making your own copy of someone else’s code on GitHub. You don’t need to understand the code; you just need your own copy so you can configure it with your credentials.
- Go to github.com/JKesslerPhD/strava-heatmap-proxy
- Click the Fork button in the top-right corner
- Leave all the default settings and click Create fork
You now have your own copy of the proxy at github.com/YOUR_USERNAME/strava-heatmap-proxy.
Step 3: Get your Strava credentials
The proxy needs two things from your Strava account: your athlete ID and a session cookie. Neither of these is your password.
Your athlete ID:
- Log in to strava.com
- Click your profile photo in the top right, then “My Profile”
- Look at the URL in your browser. It will read something like
https://www.strava.com/athletes/72766582 - The number at the end is your athlete ID. Copy it so you have it.
Your session cookie:
- While logged in to Strava, go to strava.com/maps (this loads the heatmap page)
- Open your browser’s developer tools. On Chrome or Edge: press F12 or right-click anywhere on the page and select “Inspect”. On Safari: you’ll need to enable the Develop menu first under Safari > Preferences > Advanced.
- Click the “Application” tab (Chrome/Edge) or “Storage” tab (Safari)
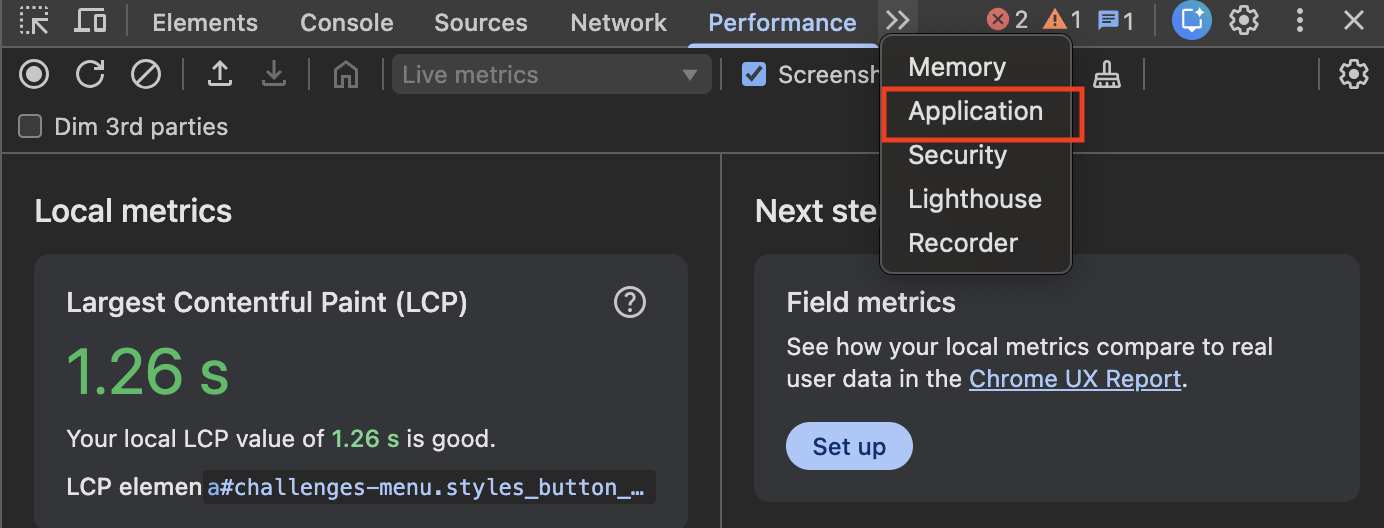
- In the left sidebar, expand “Cookies” and click on
strava.com - Find the row named
_strava4_session. You can filter for this in the inspection filter option.
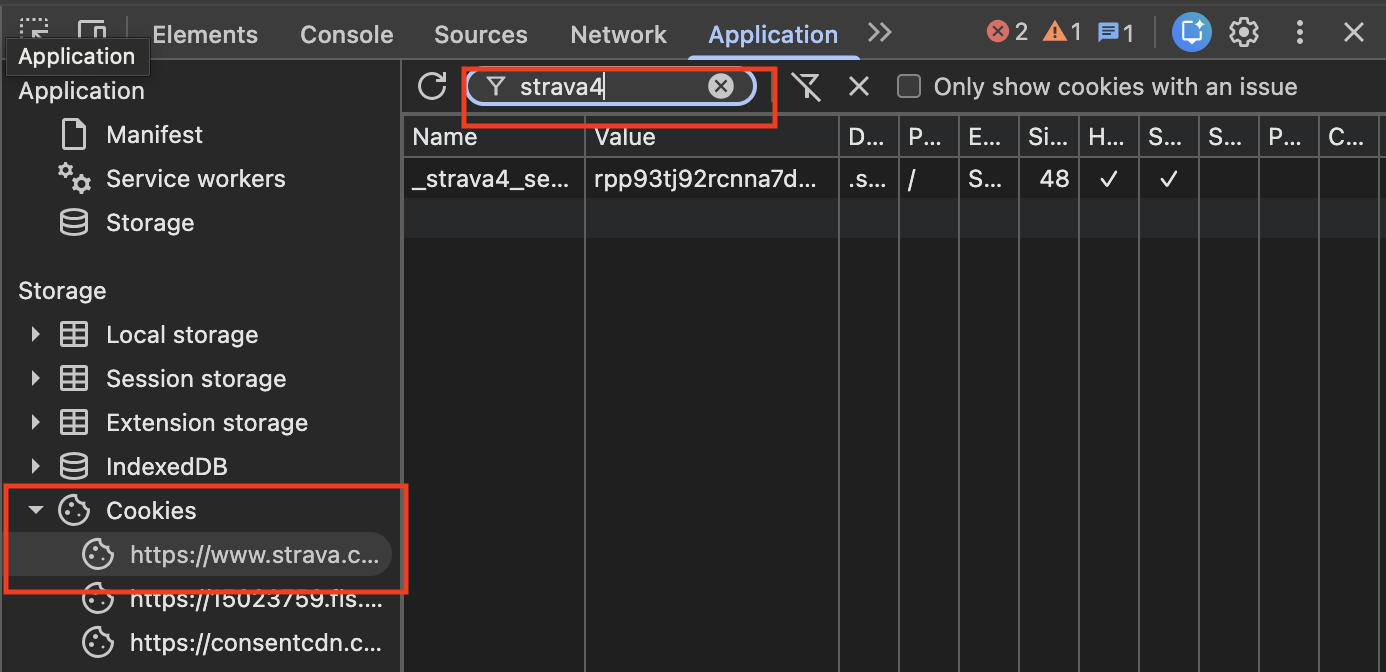
- Click on it and copy the entire value in the “Value” column; it will be a long string of letters and numbers
Keep this value somewhere safe. You’ll paste it in the next step. Note: this cookie expires periodically (usually every few months). When it expires, you’ll repeat this step and update it.
Step 4: Get your Cloudflare credentials
Your Account ID:
- Log in to cloudflare.com
- From the main dashboard, use the quick search in the left sidebar. Type “account” and select “Copy account ID”
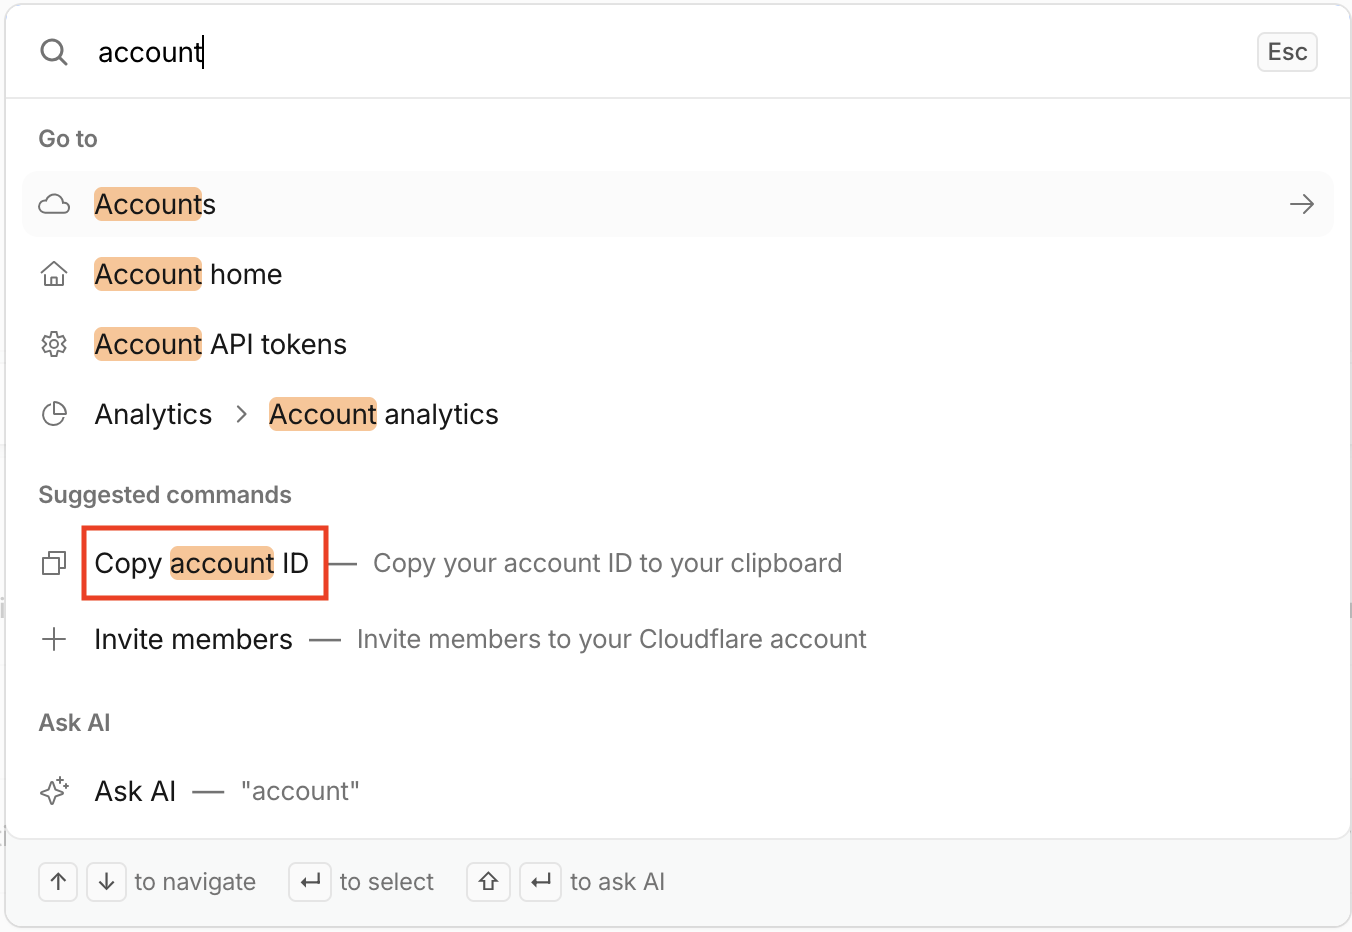
Create an API Token:
- Click your profile icon (top right) and then “My Profile”
- Click “API Tokens” in the left sidebar
- Click “Create Token”
- Click “Use template” next to “Edit Cloudflare Workers”
- Under the “Account Resources” section, set it to “Include > Your Account”
- Under “Zone Resources” set it to “Include > All Zones From An Account > Your Account”
- Click “Continue to summary” then “Create Token”
- Copy the token value. You can only see it once, so paste it somewhere safe.
Step 5: Add secrets to your GitHub repository
Your forked repository needs to know your Cloudflare account and your Strava credentials. You store these as “secrets” in GitHub; they’re encrypted and only accessible to the automated deployment process.
- Go to your forked repository:
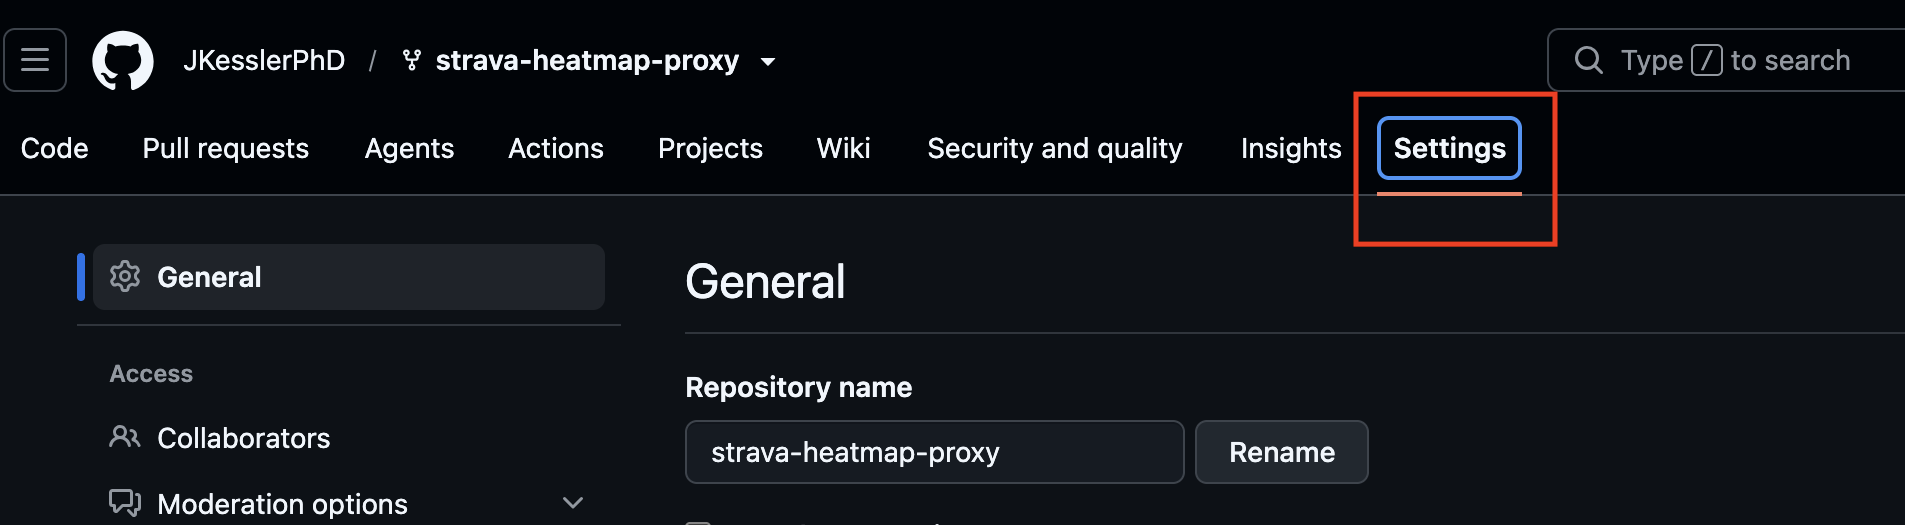
github.com/YOUR_USERNAME/strava-heatmap-proxy - Click Settings (it’s on the top menu bar of the repository webpage)
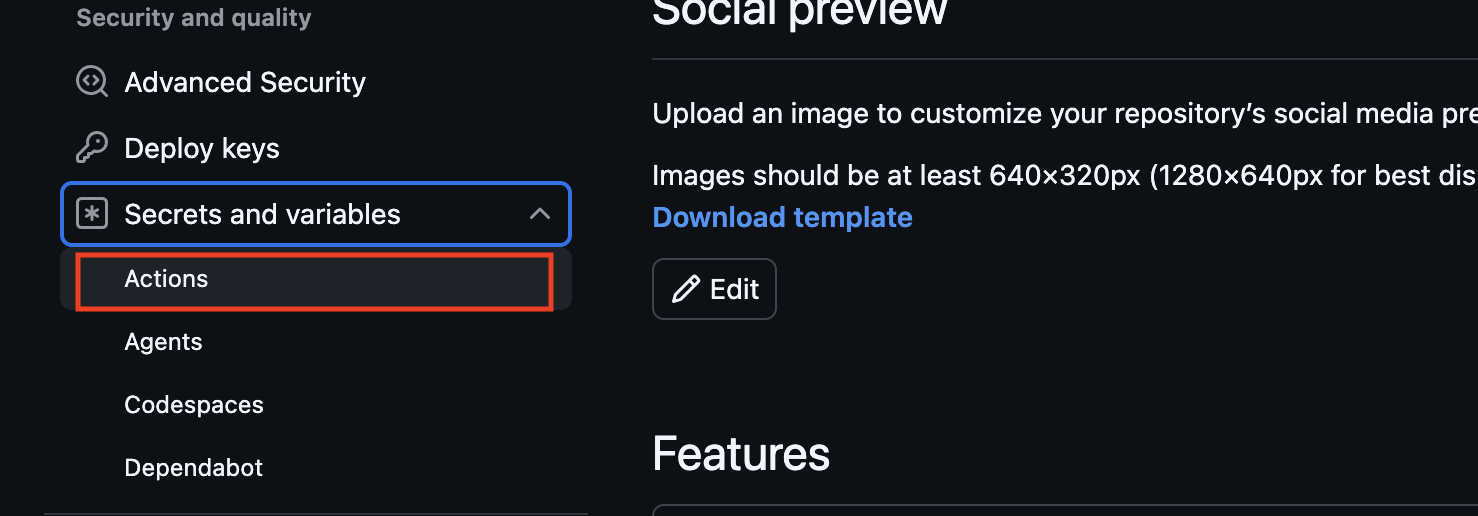
- In the left sidebar, click Secrets and variables > Actions
- Click New repository secret and add each of the following:
| Secret name | Value |
|---|---|
CF_ACCOUNT_ID | Your Cloudflare Account ID (from Step 4) |
CF_API_TOKEN | Your Cloudflare API Token (from Step 4) |
STRAVA_ID | Your Strava athlete ID (from Step 3) |
STRAVA_SESSION | Your _strava4_session cookie value (from Step 3) |
You’ll add each one by clicking “New repository secret,” entering the name and value, and clicking “Add secret.” Repeat for all four.
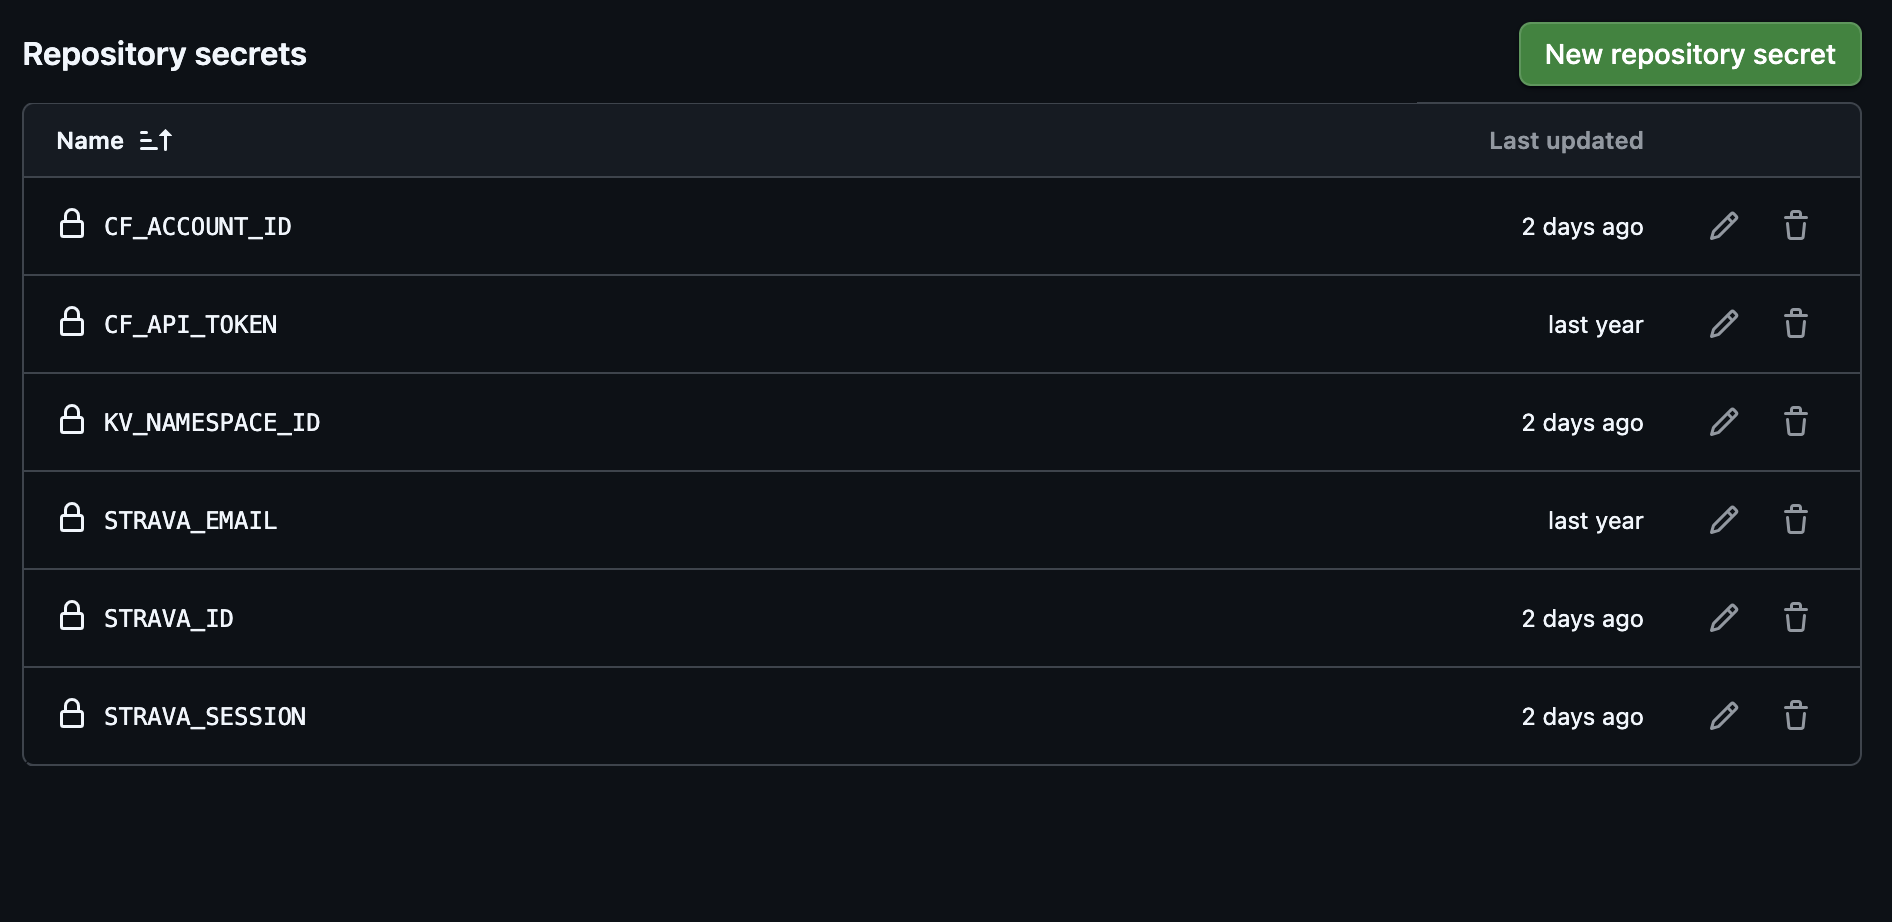
KV_NAMESPACE_ID, in the next step).You’ll also need one more secret, the KV Namespace ID, which you’ll create in the next step entirely in the Cloudflare dashboard.
Step 6: Create the KV namespace in Cloudflare
A KV namespace is a small key-value store Cloudflare uses to cache the heatmap authentication tokens so the proxy doesn’t have to re-authenticate on every tile request. You create it directly in the Cloudflare dashboard; no command line needed.
- Go to dash.cloudflare.com and log in
- In the left sidebar, use quick search and enter “Workers KV,” then click Create a KV namespace
- Name it
STRAVA_HEATMAP_PROXY_COOKIES(use this exact name) - Click Add
- Click “Metrics” at the top
- The namespace will appear on the left with an ID next to its name, a string like
abc123def456.... Copy that ID.
Now go back to your GitHub repository secrets and add one more:
| Secret name | Value |
|---|---|
KV_NAMESPACE_ID | The namespace ID from the Cloudflare KV dashboard |
Step 7: Deploy
With all five secrets in place, you can now deploy the proxy. GitHub Actions will do it automatically.
- Go to your forked repository on GitHub
- Click the Actions tab
- In the left sidebar, click Deploy to Cloudflare
- Click Run workflow > Run workflow
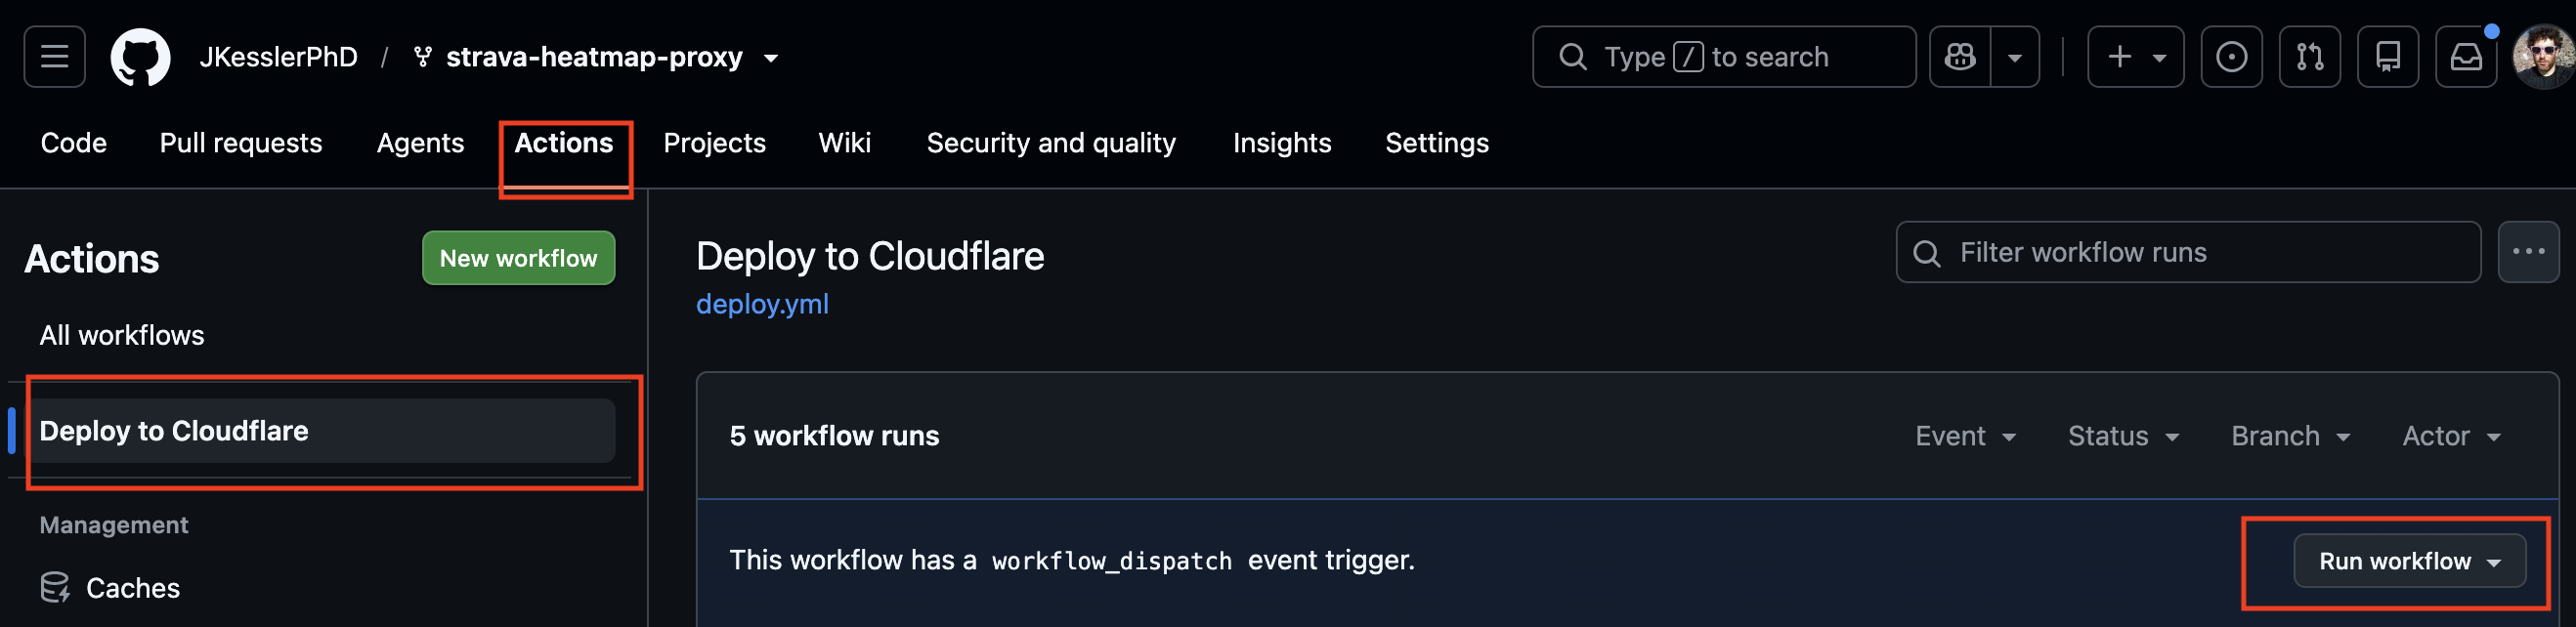
The deploy takes about 30 seconds. When it shows a green checkmark, the proxy is live.
Step 8: Find your proxy URL
Your proxy is now running at:
https://strava-heatmap-proxy.YOUR_CLOUDFLARE_SUBDOMAIN.workers.devTo find your exact subdomain, go to dash.cloudflare.com > Workers and Pages > strava-heatmap-proxy. The URL will be listed there.
Visit that URL in your browser; you should see a list of available tile URLs for different colors and activity types.
Step 9: Add the heatmap to Gaia GPS
Now for the payoff. The tile URL format for the global heatmap (all activities, orange color) is:
https://strava-heatmap-proxy.YOUR_SUBDOMAIN.workers.dev/global/orange/all/{z}/{x}/{y}@2x.pngReplace YOUR_SUBDOMAIN with your actual subdomain from Step 8.
In Gaia GPS (iOS or Android):
- Open Gaia GPS on your desktop computer (you can’t do this from the mobile device)
- Tap “Explore Layer Library” at the bottom and scroll down
- Tap Add Custom Map Source
- Name it something like “Strava Heat Map”
- Paste the URL above (with your subdomain) into the “Title URL” box
- Tap Save
The heatmap will now appear as a toggleable layer in your map. Set the opacity to around 50-60% so you can see both the heatmap and the underlying topo simultaneously.
Tile options
The proxy supports several color schemes and activity filters. Swap out the relevant part of the URL:
Colors: orange, hot, blue, bluered, purple, gray, mobileblue
Activity filters:
all— everything (most useful for route-finding)run— runners onlysport_Hike— hikers onlysport_MountainBikeRide— MTBwinter— ski/snowshoe activities
For backcountry hiking, all gives you the densest data. If you’re specifically looking for foot-travel-only routes to avoid MTB confusion, use sport_Hike, although this will also exclude trail runs and I’ve found it to be a sparser data source.
Refreshing your session cookie
The _strava4_session cookie expires periodically. When it does, the heatmap tiles will stop loading in Gaia. The fix is straightforward:
- Repeat Step 3 to get a fresh cookie
- Go to your GitHub repository > Settings > Secrets and variables > Actions
- Update the
STRAVA_SESSIONsecret with the new value - Re-run the deploy (Step 7)
This typically needs to be done every couple of months depending on your Strava session settings.
Questions?
If you run into trouble with the setup, the best resource is the original proxy repository at github.com/JKesslerPhD/strava-heatmap-proxy. Comments are open below if you get stuck on a specific step.